If you have problem with FTP for updating or Installing a Plugin. Don't worry, There are two more ways to Install Plugin in WordPress. But before begin, we Recommend a good hosting for your WordPress website like Hostinger Hosting or Bluehost. Because bad Hosting always create a problem, So always choose a trusted Hosting for your Website. Hostinger Hosting and Bluehost Hosting both are trusted and using worldwide. Great Uptime makes website always visible for visitors or customers and makes profitable business.
Install Plugin in WordPress Manually without FTP
There are two options available for installing or updating a Plugin without FTP. All steps follow carefully and make backup of your website before taking a action. For Better understanding, take a look of screenshot in all steps. If you missed any step, may be plugin instalation will fail.
Install Plugin Manually from WordPress Dashboard (Recommend)
Ist Method: This method is more secure and provided by WordPress. we highly Recommend to use this method for installing or updating a Plugin.
1. Login to your WordPress Dashboard.
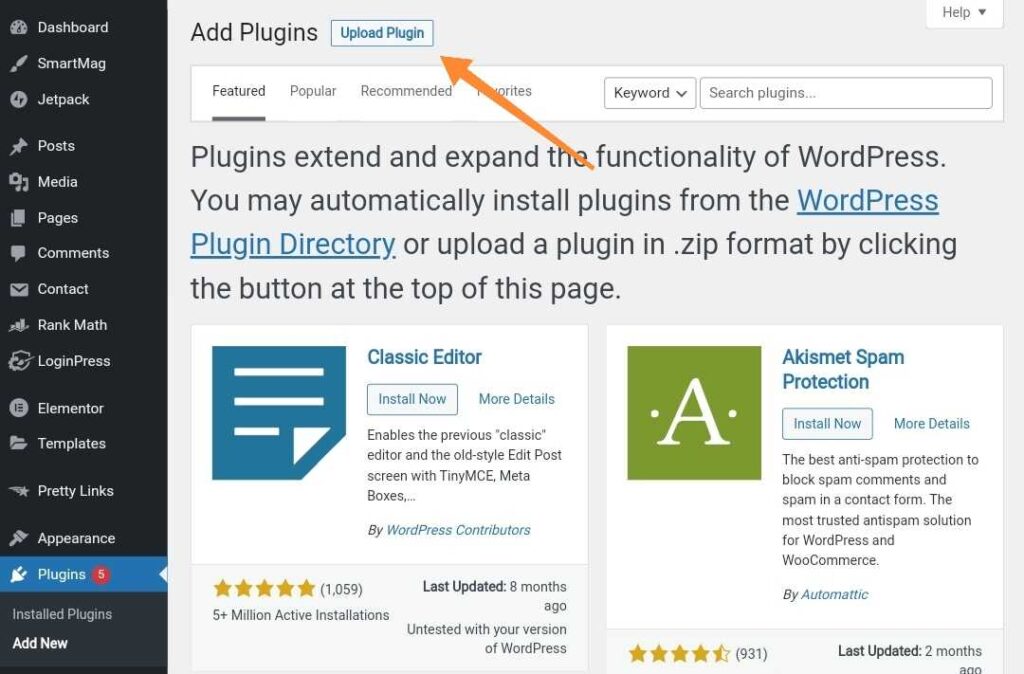
2. Now Click on Plugins in left side menu.
3. Next, Click on Add New in Plugins section below the Installed Plugin.

4. Click on Upload Plugin as Shown in Image.
Install Plugin in WordPress Manually, Update Plugin in WordPress Manually,
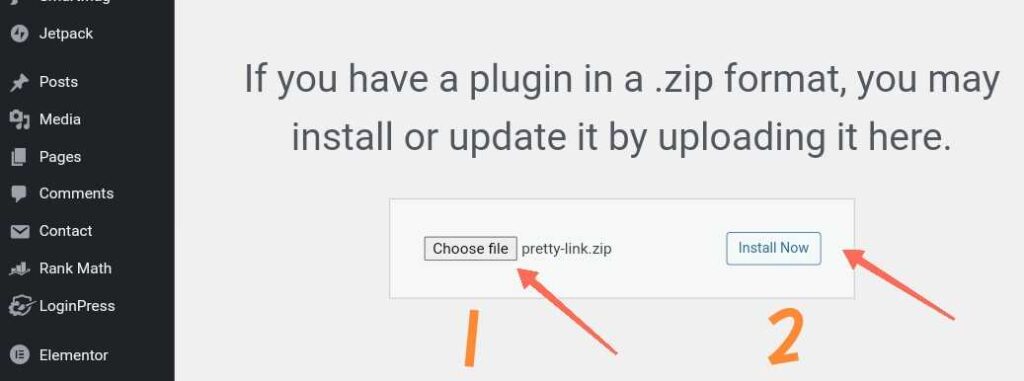
5. Choose the Plugin (Zip file) by clicking Choose file option or Drag and Drop from your Computer.
6. Click on Install Now, Your Plugin will install in few moment according to file size.
7. If nothing goes wrong then you will see Activate Plugin option, Finally click on Activate Plugin.
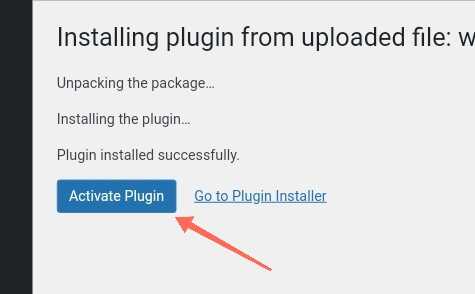
Whoa, Deep breath. You have Successfully installed/Updated Plugin on your WordPress website.
Install Plugin Manually using Cpanel (Not Recommend)
2nd Method: This method is alternate if first method doesn't work. We not Recommend this method. You can perform this action at your own risk. We highly Recommend to take a backup of your website before taking any step further.
1. Login to your Cpanel.
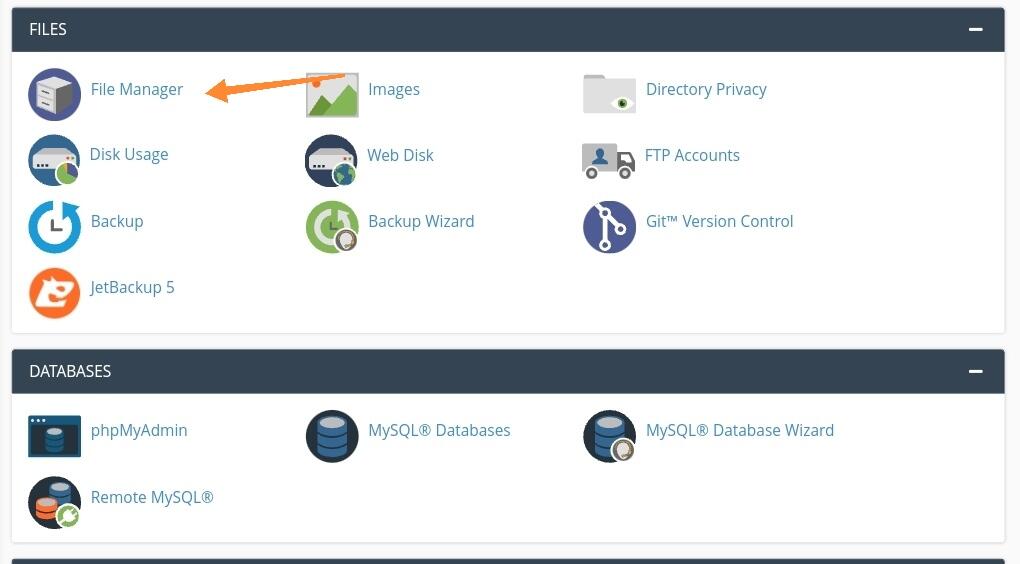
2. Search for File Manager in FILES section of Cpanel.
3. Click on File Manager, it will be open in Tab.
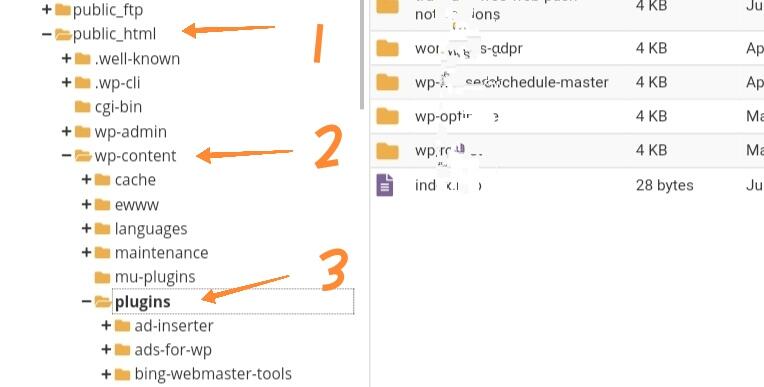
4. Click on Directory where wordpress installed. (In most cases, Public_html)
5. Click on wp-content.
6. Click on Plugins under wp-content directory.
7. Click on Upload under Plugins directory. New Tab will be appear for uploading the file.

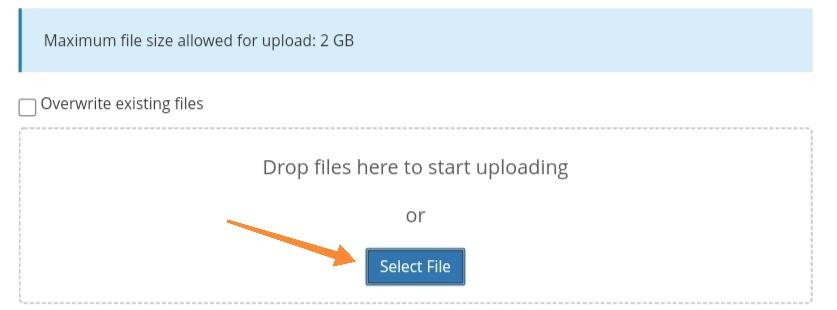
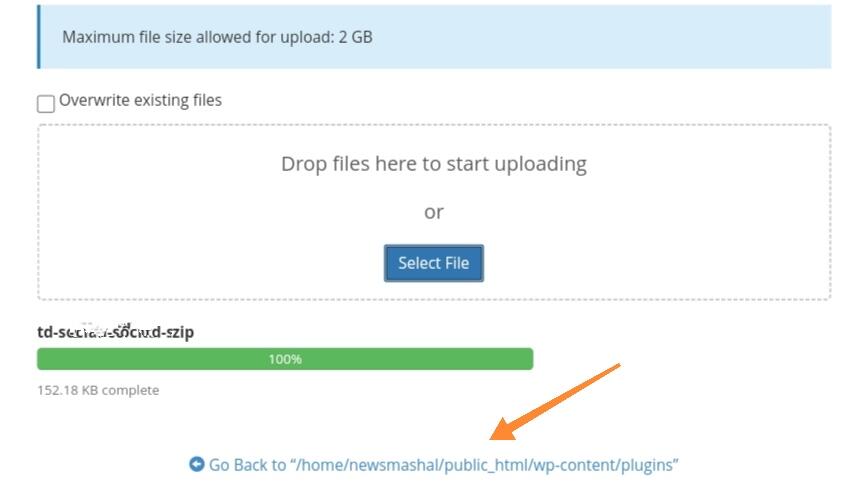
8. Click on Select File and choose plugin file from your Computer in Zip format or drop the Zip file.
9. When file uploading 100% done, a green color appear there. Now just click Go Back To home/…./…
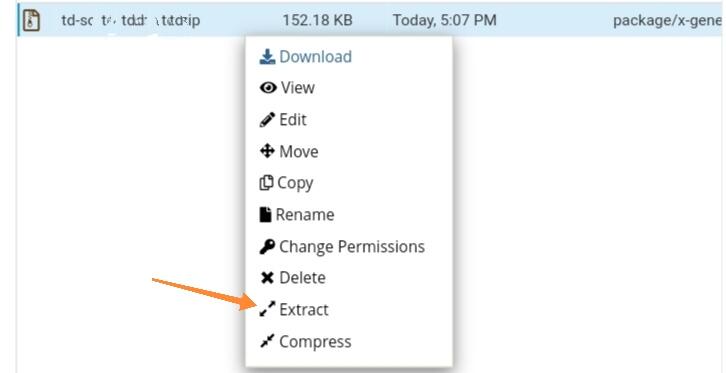
10. Left click on uploaded Zip file (Plugin file) and click on Extract in the same folder.
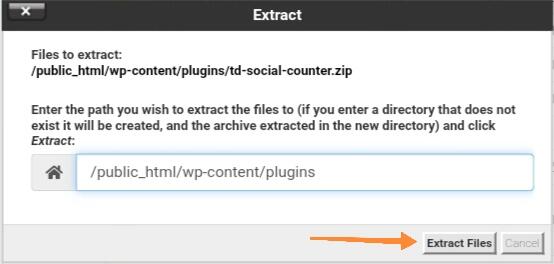
11. After clicking on Extract you will see a Pop-up with directory. Double check your directory, it should be /wp-content/Plugins in the ending. Now Click on Extract Files.
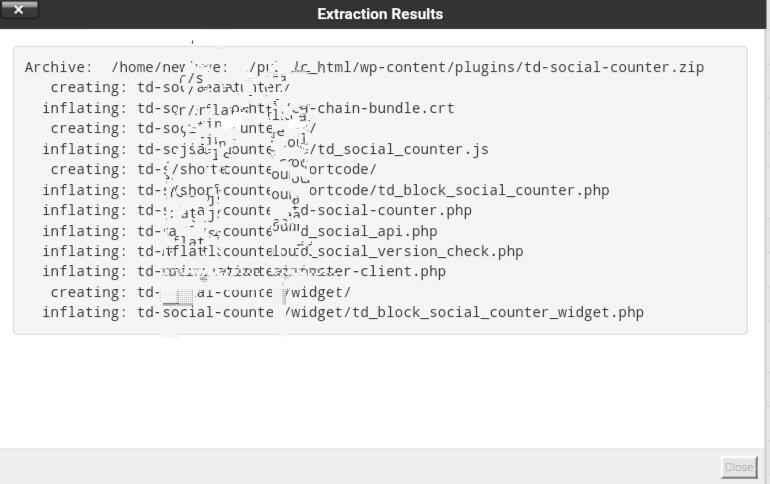
12. Finally your Plugin Installed successfully in the directory of WordPress. Just close the Pop-up window.
Now go to WordPress Dashboard and Check your Plugins Section, a new uploaded plugin should be there. Just Activate it and enjoy your Blogging.
After Activating your Plugin go back to your Cpanel and delete the Uploaded Zip file for security reasons. If you have any questions or Suggestions regarding this issue, feel free comment below or write to us.

